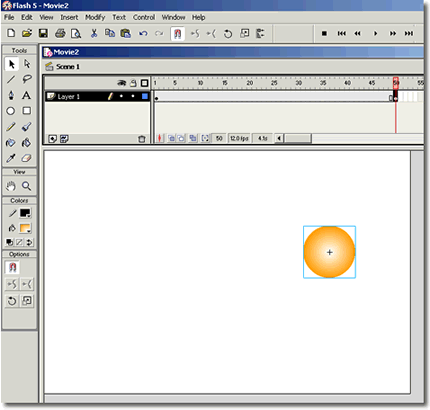
| Flash Inserting Key Frames Inserting Key Frames | Exporting Shockwave | Going Further Now we are going to cause our filled circle to move from one point to another on the stage. To do that we need to designate the frames in the timeline over which the motion will take place. Notice the timeline in Layer 1. (Your animations can have any number of layers, and each layer has a separate timeline. But now there should be only one layer in your present file unless you've inadvertently added another one). At this point you should see a single frame in the timeline of this layer, and there should be a dot inside this frame  . The dot means that frame is a key frame. Key frames are the frames that mark where you make a change to an animation. (Note the importance of "you" here. The Flash program itself can interpolate changes over non-key frames, as we will see below. But you, the animation's creator, have to specify what the animation looks like at the key frames.) . The dot means that frame is a key frame. Key frames are the frames that mark where you make a change to an animation. (Note the importance of "you" here. The Flash program itself can interpolate changes over non-key frames, as we will see below. But you, the animation's creator, have to specify what the animation looks like at the key frames.) In our example we already have a key frame in Frame 1. Now we want to add a key frame where the action stops. Go to Frame 50 and click with your mouse; note how the frame is highlighted in black. Then go to the Main Menu and pulldown "Insert" and "Key Frame". Note that Frame 50 is now marked with a dot as a key frame also. 
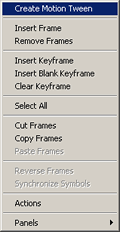
However we are not done yet. We still have to specify how our symbol (the filled circle) is to travel across the stage. To do this, we must use the Select tool (the arrow) to drag the circle and position it to where we want it to be at Frame 50. Note how the frames between Frame 1 and Frame 50 have now been replaced with a solid gray bar. A great thing about Flash is that you can have the program automatically change the position of the filled circle so that as the animation plays along its timeline the circle travels from its position in Frame 1 to its position in Frame 50. This is accomplished by use of the "motion tween" command. Move the mouse cursor to anyplace on the gray bar and right-click with your mouse; then highlight "Create Motion Tween" in the popup menu.
The timeline between Frame 1 and Frame 50 should now show a directional arrow:  This indicates that tweening has been applied between the two frames.
Testing the Tween
Now, we can test our simple animation. Under "Control" in the main menu, select "Test Movie." If you have done everything correctly, the filled circle should move across the stage. That is pretty impressive, isn't it! If the motion doesn't work correctly, go back over the previous steps and be certain that you followed them exactly. Once you get the hang of it, animation with Flash is not hard, but you must do each step correctly for the animation to behave as you want. Save your work before proceeding to the next step. |